Selbst-gehostetes Tagebuch für Wechseljahres-Beschwerden und Zyklus-Tracking. Alle Daten bleiben auf deinem eigenen Server, niemand außerhalb deines Haushalts hat Zugriff.
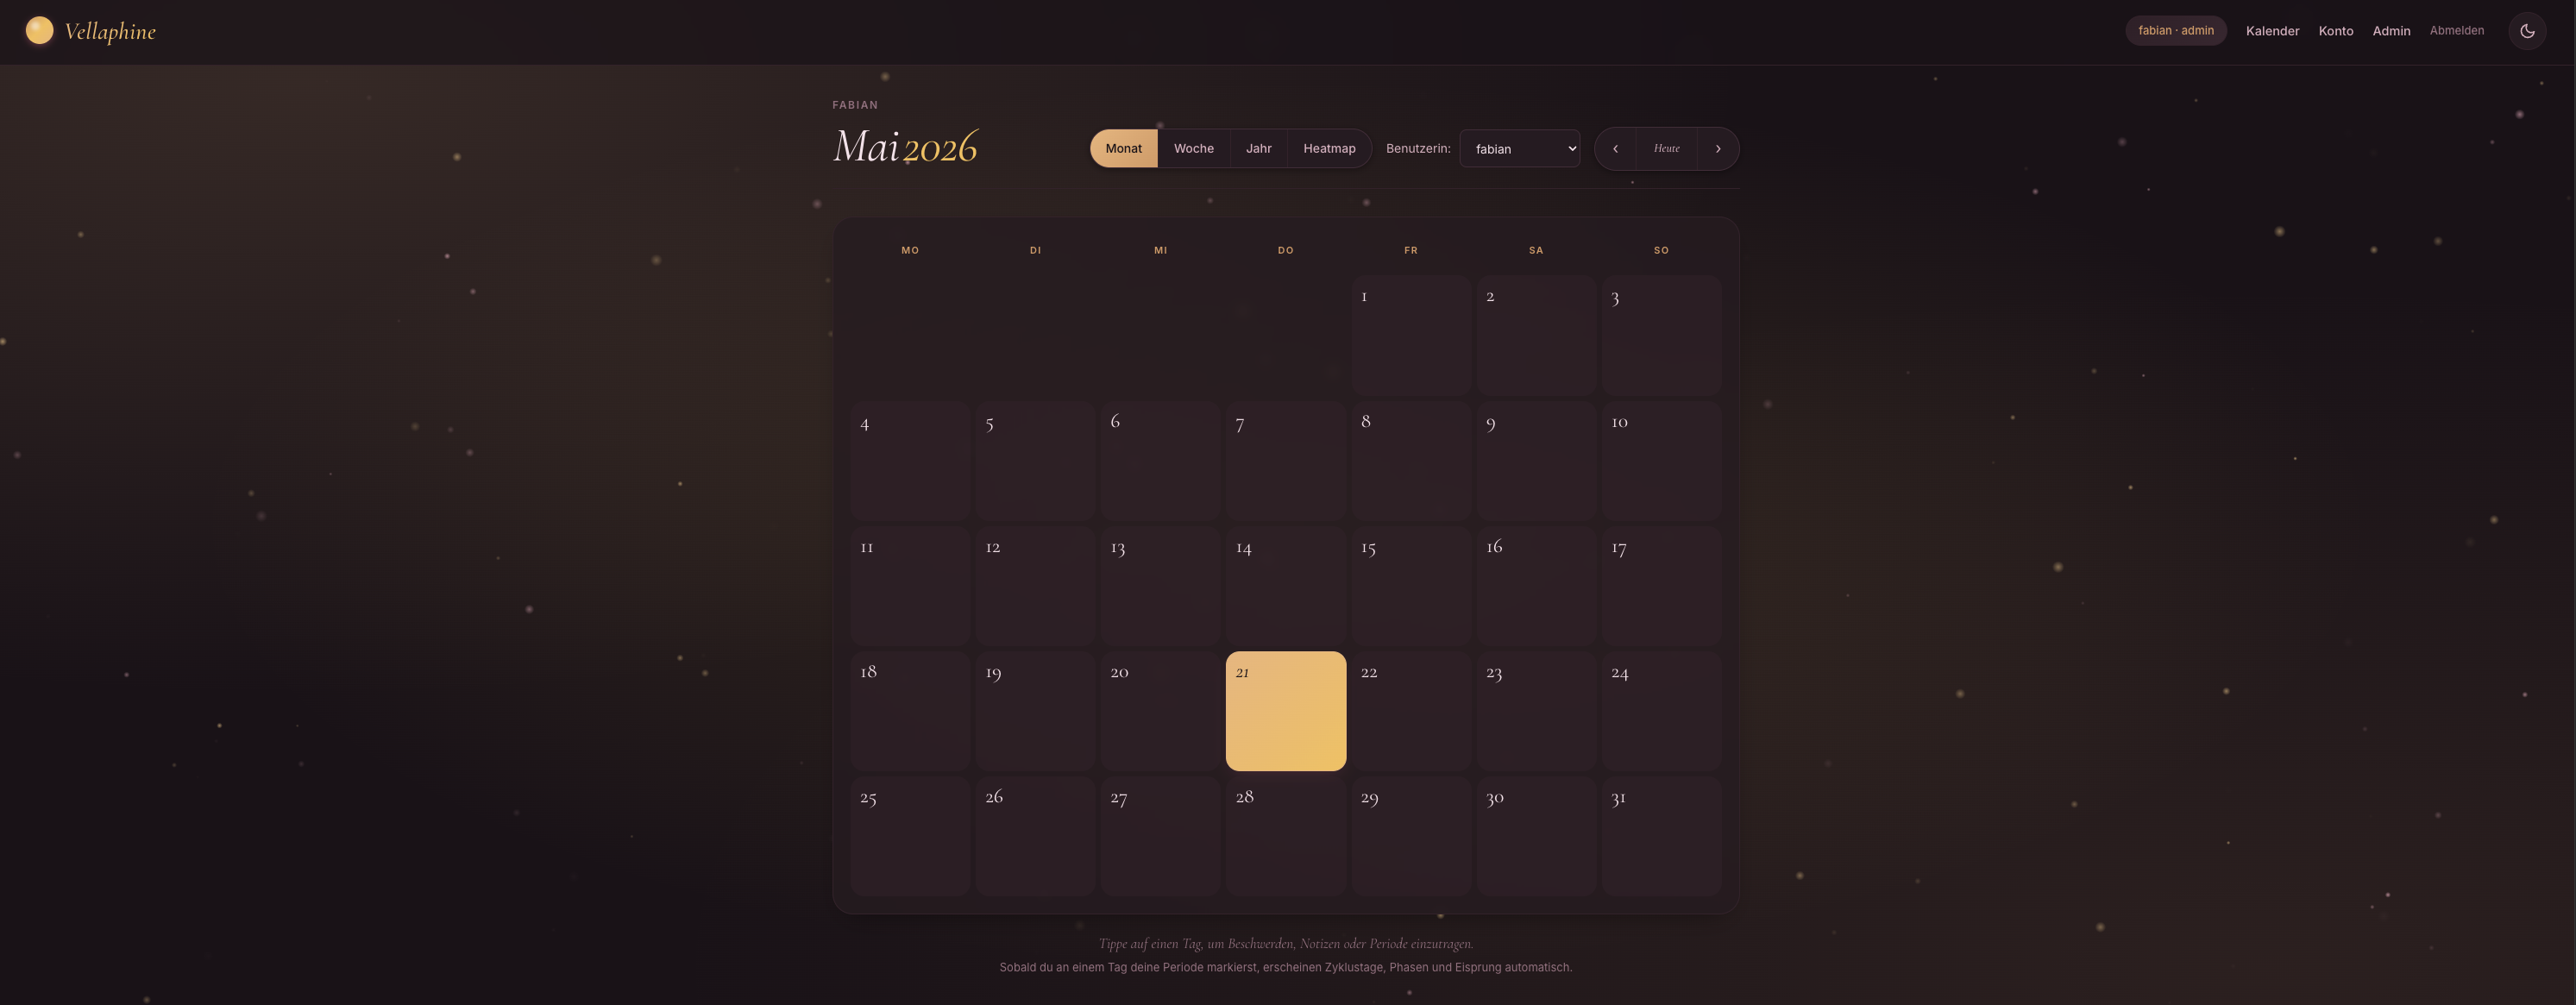
Dein persönlicher Begleiter durch jede Lebensphase.
Selbst-gehostetes Tagebuch für Wechseljahres-Beschwerden und Zyklus-Tracking. Alle Daten bleiben auf deinem eigenen Server, niemand außerhalb deines Haushalts hat Zugriff.
Diese Anleitung deckt alle gängigen Plattformen ab — Linux, macOS, Windows, NAS-Geräte, Raspberry Pi und Cloud-Server.
---
---
| Komponente | Minimum | Empfohlen | |------------|---------|-----------| | Docker Engine | 20.10 | 24.0+ | | Docker Compose | v2 (Plugin) | v2.20+ | | Festplatte | 250 MB | 1 GB | | Arbeitsspeicher | 256 MB | 512 MB | | CPU | 1 Kern (x86_64 oder ARM64) | 2 Kerne | | Port | 8421 (frei) | beliebig konfigurierbar | | Netzwerk | nur LAN für Erst-Setup | Internet für Updates | | HTTPS | optional | erforderlich für Push-Benachrichtigungen |
Vellaphine läuft headless als Docker-Container. Eine grafische Oberfläche wird nicht benötigt.
---
Auf jedem System mit installiertem Docker und Docker Compose:
# 1. ZIP entpacken
unzip vellaphine.zip -d vellaphine
cd vellaphine

# 2. Container bauen und starten
docker compose up -d --build

# 3. App im Browser öffnen
# http://<host>:8421
Standard-Login:
adminadmin⚠️ Sofort ändern unter "Konto" → "Passwort" nach dem ersten Login.
Beim ersten Start werden automatisch erstellt:
data/vellaphine.dbdata/secret.keydata/vapid_priv.pem + data/vapid_pub.txt---
sudo apt update && sudo apt upgrade -y
sudo apt install -y ca-certificates curl gnupg

sudo install -m 0755 -d /etc/apt/keyrings
sudo curl -fsSL https://download.docker.com/linux/ubuntu/gpg -o /etc/apt/keyrings/docker.asc
sudo chmod a+r /etc/apt/keyrings/docker.asc

echo "deb [arch=$(dpkg --print-architecture) signed-by=/etc/apt/keyrings/docker.asc] \
  https://download.docker.com/linux/ubuntu $(. /etc/os-release && echo "$VERSION_CODENAME") stable" | \
  sudo tee /etc/apt/sources.list.d/docker.list > /dev/null

sudo apt update
sudo apt install -y docker-ce docker-ce-cli containerd.io docker-buildx-plugin docker-compose-plugin
sudo usermod -aG docker $USER
Bei Debian den Pfad in der Repository-Zeile durch linux/debian ersetzen.
mkdir -p ~/docker/vellaphine
cd ~/docker/vellaphine
unzip /pfad/zu/vellaphine.zip -d .
docker compose up -d --build
Beim ersten Build werden u.a. bcrypt und cryptography (für Push) kompiliert. Auf x86_64 dauert das ca. 2–3 Minuten, auf ARM64 (Pi) ca. 4–6 Minuten.
Docker-Container mit restart: unless-stopped (bereits in docker-compose.yml gesetzt) starten automatisch nach Reboot.
sudo systemctl enable docker
---
sudo dnf -y install dnf-plugins-core
sudo dnf config-manager --add-repo https://download.docker.com/linux/fedora/docker-ce.repo
sudo dnf install -y docker-ce docker-ce-cli containerd.io docker-compose-plugin

sudo systemctl enable --now docker
sudo usermod -aG docker $USER

mkdir -p ~/docker/vellaphine && cd ~/docker/vellaphine
unzip /pfad/zu/vellaphine.zip -d .
docker compose up -d --build
Auf RHEL/Rocky/AlmaLinux den Pfad durch linux/centos ersetzen.
sudo firewall-cmd --permanent --add-port=8421/tcp
sudo firewall-cmd --reload
Bei aktivem SELinux:
chcon -Rt svirt_sandbox_file_t ./data
---
sudo pacman -S docker docker-compose
sudo systemctl enable --now docker
sudo usermod -aG docker $USER

mkdir -p ~/docker/vellaphine && cd ~/docker/vellaphine
unzip /pfad/zu/vellaphine.zip -d .
docker compose up -d --build
---
.dmg öffnen, App in den Programme-Ordner ziehenAlternative: OrbStack (https://orbstack.dev) — schneller und ressourcenschonender als Docker Desktop. Kostenlos für Privatnutzung.
mkdir -p ~/Docker/vellaphine
cd ~/Docker/vellaphine
unzip ~/Downloads/vellaphine.zip -d .
docker compose up -d --build
App im Browser öffnen: http://localhost:8421
Docker Desktop → Einstellungen → "Start Docker Desktop when you log in" aktivieren.
---
   wsl --install
   wsl --set-default-version 2
In der WSL2-Shell (Ubuntu):
mkdir -p ~/docker/vellaphine
cd ~/docker/vellaphine
cp /mnt/c/Users/<DeinUser>/Downloads/vellaphine.zip .
unzip vellaphine.zip
docker compose up -d --build
App im Browser öffnen: http://localhost:8421
---
/docker/vellaphine anlegen, ZIP-Inhalt dort entpacken- Projekt-Name: vellaphine - Pfad: /docker/vellaphine - Quelle: "docker-compose.yml verwenden, das im Ordner existiert"
ssh admin@nas
sudo -i
cd /volume1/docker
mkdir vellaphine && cd vellaphine
unzip /volume1/homes/admin/vellaphine.zip -d .
docker compose up -d --build
App: http://nas-ip:8421
DSM-Schalttafel → "Anmeldeportal" → "Erweitert" → "Reverse-Proxy" → "Erstellen":
vellaphine.deine-domain.tld, Port 443localhost, Port 8421DSM kümmert sich um das Let's Encrypt-Zertifikat unter "Sicherheit" → "Zertifikat".
---
UGOS basiert auf Debian. Vellaphine läuft hier sehr gut.
ssh user@nas-ip
sudo -i
mkdir -p /volume1/docker/vellaphine
cd /volume1/docker/vellaphine

unzip /volume1/uploads/vellaphine.zip -d .
docker compose up -d --build
App: http://nas-ip:8421
UGREEN Container Manager öffnen → "Projekt erstellen" → Pfad /volume1/docker/vellaphine → Compose-Datei verwenden.
UGOS-Standard: PUID=1000, PGID=10. Falls Vellaphine die data/-Files nicht schreiben kann, im docker-compose.yml ergänzen:
services:
  vellaphine:
    user: "1000:10"
---
docker-compose.yml einfügen, Volume-Pfad anpassen: volumes:
- /share/Container/vellaphine/data:/data
/share/Container/vellaphine/ kopieren---
ssh root@truenas
cd /mnt/<pool>/docker
mkdir vellaphine && cd vellaphine
unzip /tmp/vellaphine.zip -d .
docker compose up -d --build
TrueNAS SCALE 24.10+ nutzt offiziell Docker, vorher k3s. Bei k3s-Versionen "Custom App" mit den Container-Parametern aus dem Dockerfile nutzen.
---
curl -fsSL https://get.docker.com | sudo sh
sudo usermod -aG docker $USER
newgrp docker

mkdir -p ~/docker/vellaphine && cd ~/docker/vellaphine
unzip ~/vellaphine.zip
docker compose up -d --build
Erste Build-Phase auf einem Pi 4 dauert ca. 6–8 Minuten (bcrypt + cryptography werden kompiliert). Danach läuft die App mit ~80–120 MB RAM.
64-Bit-OS empfohlen (Raspberry Pi OS 64-bit oder Ubuntu Server arm64).
---
apt update && apt upgrade -y
curl -fsSL https://get.docker.com | sh
apt install -y unzip

mkdir -p /opt/vellaphine && cd /opt/vellaphine
unzip ~/vellaphine.zip
docker compose up -d --build
App via öffentlicher IP: http://<vps-ip>:8421
⚠️ Auf öffentlichen Servern unbedingt:
   ufw allow 22/tcp
   ufw allow 80/tcp
   ufw allow 443/tcp
   ufw deny 8421/tcp
   ufw enable
---
http://<host>:8421admin / admin einloggenStandardmäßig deaktiviert. Aktivieren unter:
---
Für HTTPS und einen schönen Domainnamen brauchst du einen Reverse-Proxy. Web-Push-Notifications funktionieren nur mit HTTPS. Ohne TLS akzeptiert der Browser keine Subscription.
/etc/caddy/Caddyfile ergänzen:
vellaphine.deine-domain.tld {
    reverse_proxy localhost:8421
    encode gzip zstd
    header {
        X-Frame-Options "SAMEORIGIN"
        X-Content-Type-Options "nosniff"
        Referrer-Policy "strict-origin-when-cross-origin"
        -Server
    }
}
HTTPS mit Let's Encrypt automatisch eingerichtet. sudo systemctl reload caddy.
vellaphine.deine-domain.tld<docker-host-ip> oder vellaphine8421/etc/nginx/sites-available/vellaphine.conf:
server {
    listen 443 ssl http2;
    server_name vellaphine.deine-domain.tld;

    ssl_certificate /etc/letsencrypt/live/.../fullchain.pem;
    ssl_certificate_key /etc/letsencrypt/live/.../privkey.pem;

    location / {
        proxy_pass http://127.0.0.1:8421;
        proxy_set_header Host $host;
        proxy_set_header X-Real-IP $remote_addr;
        proxy_set_header X-Forwarded-For $proxy_add_x_forwarded_for;
        proxy_set_header X-Forwarded-Proto $scheme;
    }
}
server {
    listen 80;
    server_name vellaphine.deine-domain.tld;
    return 301 https://$server_name$request_uri;
}
sudo ln -s /etc/nginx/sites-available/vellaphine.conf /etc/nginx/sites-enabled/
sudo certbot --nginx -d vellaphine.deine-domain.tld
sudo nginx -t && sudo systemctl reload nginx
docker-compose.yml erweitern:
services:
  vellaphine:
    labels:
      - traefik.enable=true
      - traefik.http.routers.vellaphine.rule=Host(`vellaphine.deine-domain.tld`)
      - traefik.http.routers.vellaphine.tls.certresolver=letsencrypt
      - traefik.http.services.vellaphine.loadbalancer.server.port=8421
    networks:
      - traefik
networks:
  traefik:
    external: true
Sobald Vellaphine ausschließlich über HTTPS erreichbar ist:
services:
  vellaphine:
    environment:
      - SECURE_COOKIES=1
⚠️ Erst aktivieren, wenn HTTPS läuft.
---
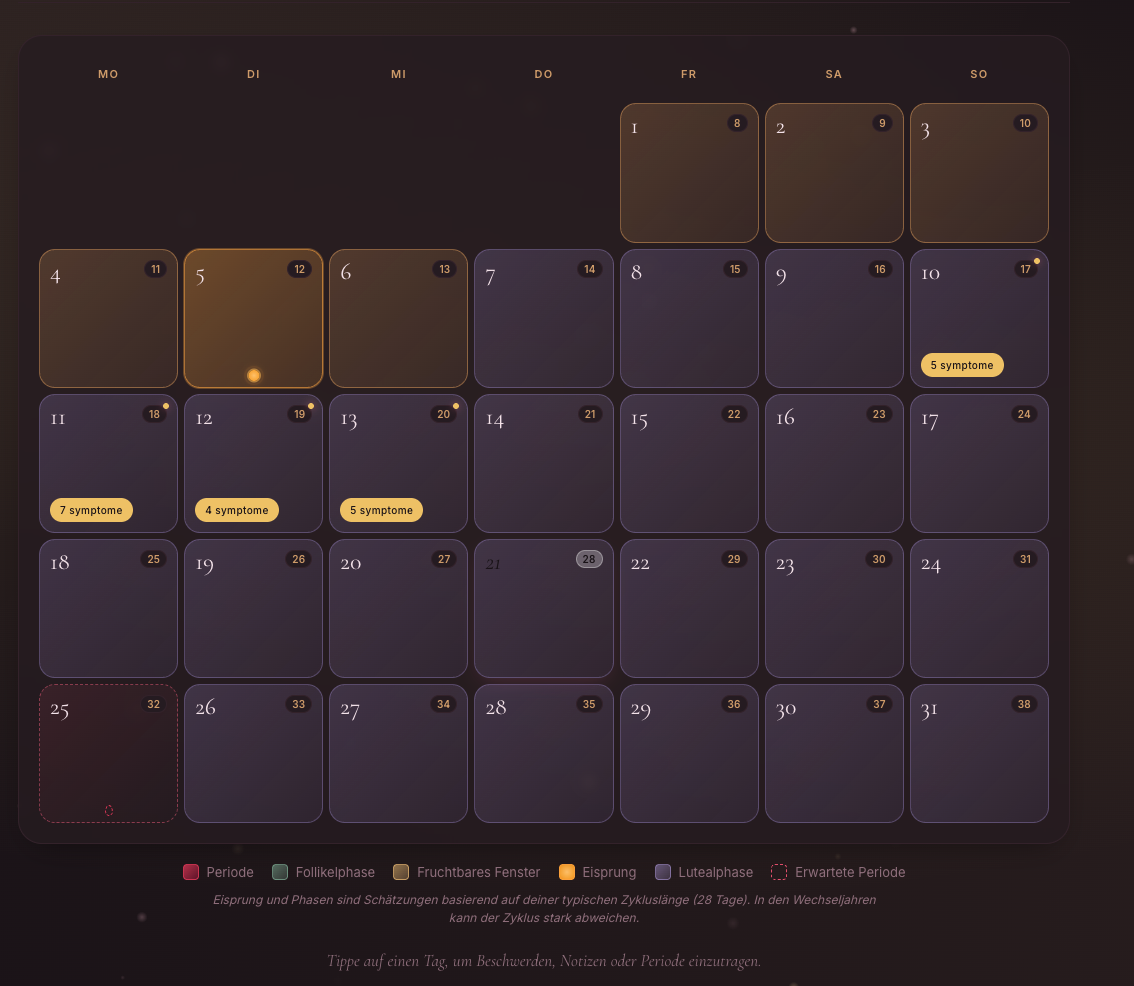
Vellaphine kann erinnern an erwartete Periode, Eisprung-Tag und tägliche Tagebuch-Einträge.
pywebpush (im Dockerfile bereits vorgesehen)Werden beim ersten Container-Start automatisch generiert in:
data/vapid_priv.pem (privat, niemals weitergeben)data/vapid_pub.txt (Public Key, vom Frontend abgefragt)Niemals löschen — bei Verlust müssen alle Subscriptions neu erstellt werden.
Im docker-compose.yml:
environment:
  - VAPID_SUBJECT=mailto:dein-name@deine-domain.tld
Standardmäßig mailto:admin@example.com. Manche Push-Services (besonders Mozilla Autopush) verlangen eine echte Mail-Adresse — sonst kommen Pushes nicht an.
- Periode-Erinnerung — wenn die Periode für heute erwartet wird - Eisprung-Hinweis — am Tag des geschätzten Eisprungs - Tägliche Tagebuch-Erinnerung — frei wählbare Uhrzeit (Default 20:00)
Im Container läuft ein Background-Thread, der alle 5 Minuten prüft, ob Push-Notifications fällig sind. Bei Mehr-Worker-Setup (z. B. gunicorn mit 2 Workern) sorgt ein File-Lock (data/notify.lock) dafür, dass nur ein Worker tatsächlich sendet.
Jedes Gerät und jeder Browser muss separat aktiviert werden — das ist Browser-bedingt, nicht Vellaphine. Eine Subscription gehört genau einem Browser-Profil. Bei Cookie-Löschung muss neu aktiviert werden.
# Im Container prüfen, ob pywebpush funktioniert
docker compose exec vellaphine python -c \
  "from pywebpush import webpush; print('OK')"

# VAPID-Keys vorhanden?
docker compose exec vellaphine ls -la /data/vapid_*

# /api/push/key liefert den Public Key?
curl -s http://localhost:8421/api/push/key
# erwartete Antwort: {"public_key":"BG...","enabled":true}

# Health zeigt has_webpush
curl -s http://localhost:8421/healthz
# erwartete Antwort: {"app":"Vellaphine","has_webpush":true,"status":"ok",...}
Wenn enabled: false oder has_webpush: false: pywebpush-Modul wurde nicht installiert (Build-Problem). Logs prüfen:
docker compose logs vellaphine | grep -i pywebpush
Lösung meist: Container neu bauen mit --no-cache:
docker compose build --no-cache && docker compose up -d
---
Alle Daten liegen ausschließlich in ./data/ neben der docker-compose.yml:
vellaphine.db — SQLite-Datenbank (User, Einträge, Symptome, Custom-Symptome, Push-Subscriptions, Mood/Energy)secret.key — Session-Schlüsselvapid_priv.pem + vapid_pub.txt — Push-Schlüsselnotify.lock — Background-Worker-Lock (kann ignoriert werden)cd /pfad/zu/vellaphine
tar czf vellaphine-backup-$(date +%F).tar.gz data/
/etc/cron.daily/vellaphine-backup:
#!/bin/bash
cd /opt/vellaphine
tar czf "/mnt/backup/vellaphine-$(date +\%F).tar.gz" data/
find /mnt/backup/ -name "vellaphine-*.tar.gz" -mtime +30 -delete
chmod +x /etc/cron.daily/vellaphine-backup
Zusätzlich zum Server-Backup kann jede Benutzerin ihre eigenen Daten exportieren:
cd /pfad/zu/vellaphine
docker compose down
rm -rf data
tar xzf vellaphine-backup-2026-05-10.tar.gz
docker compose up -d
---
data/-Volume bleibt immer unangetastet — Schema-Änderungen werden automatisch via ALTER TABLE migriert (z. B. neue Spalten für Mood, Energy, Custom-Symptome, Notifications).
cd /pfad/zu/vellaphine
docker compose down
unzip -o vellaphine-neu.zip -d .
docker compose up -d --build
Nach Update prüfen:
docker compose logs vellaphine | tail -30
---
docker compose logs -f vellaphine                  # Live
docker compose logs --tail=100 vellaphine          # Letzte 100 Zeilen
docker compose logs --since=$(date -I) vellaphine  # Nur ab heute
docker compose ps                                  # Container-Status
docker compose exec vellaphine bash                # Shell im Container
curl http://localhost:8421/healthz
# {"app":"Vellaphine","status":"ok","time":"...","has_webpush":true}
docker compose exec vellaphine python -c \
  "import sqlite3; c=sqlite3.connect('/data/vellaphine.db'); \
   print(c.execute('SELECT username, is_admin, color_mode, accent_palette, notify_period_expected FROM users').fetchall())"
docker compose exec vellaphine python -c \
  "import sqlite3; c=sqlite3.connect('/data/vellaphine.db'); \
   print(c.execute('SELECT user_id, COUNT(*) FROM push_subscriptions GROUP BY user_id').fetchall())"
docker compose exec vellaphine python -c \
  "import sqlite3; c=sqlite3.connect('/data/vellaphine.db'); \
   print(c.execute('SELECT label, sym_group FROM custom_symptoms WHERE user_id=1').fetchall())"
---
Anderer Service nutzt den Port. Im docker-compose.yml:
ports:
  - "8488:8421"
/datasudo chown -R 1000:1000 ./data
Admin-Reset:
docker compose exec vellaphine python -c \
  "import bcrypt, sqlite3; \
   h = bcrypt.hashpw(b'NeuesPasswort', bcrypt.gensalt()).decode(); \
   c = sqlite3.connect('/data/vellaphine.db'); \
   c.execute('UPDATE users SET password_hash=? WHERE username=?', (h, 'admin')); \
   c.commit()"
Reihenfolge der Prüfungen:
https:// aufgerufen? Ohne TLS verweigert der Browser die Permission./api/push/key einen gültigen Key? (siehe oben)Auf iOS Safari: Push funktioniert erst ab iOS 16.4 und nur, wenn die App vorher als "Zum Home-Bildschirm hinzufügen" gespeichert wurde.
Konto → Hintergrund → "Keiner". Spart CPU komplett.
sudo systemctl start docker
sudo usermod -aG docker $USER
newgrp docker
Auf ARM-Geräten (Pi, Apple Silicon) braucht cryptography (Push-Dependency) 3–6 Minuten. Geduld haben — wird gecached, Folge-Builds sind schnell.
Falls Build dennoch fehlschlägt: prüfen, ob gcc, libffi-dev, libssl-dev im Dockerfile enthalten sind (sind im Standard-Dockerfile drin). Bei sehr alten ARM-Systemen ggf. pip install --upgrade pip im Build-Step ergänzen.
docker compose ps
docker compose exec vellaphine curl -s http://localhost:8421/healthz
sudo ufw status
sudo iptables -L
Das ist Browser-Druck-Verhalten. Im Druck-Dialog "Mehr Einstellungen" → "Hintergrundgrafiken" deaktivieren für reines Schwarz/Weiß. Oder Firefox statt Chrome — rendert PDF-Druck oft kontrastreicher.
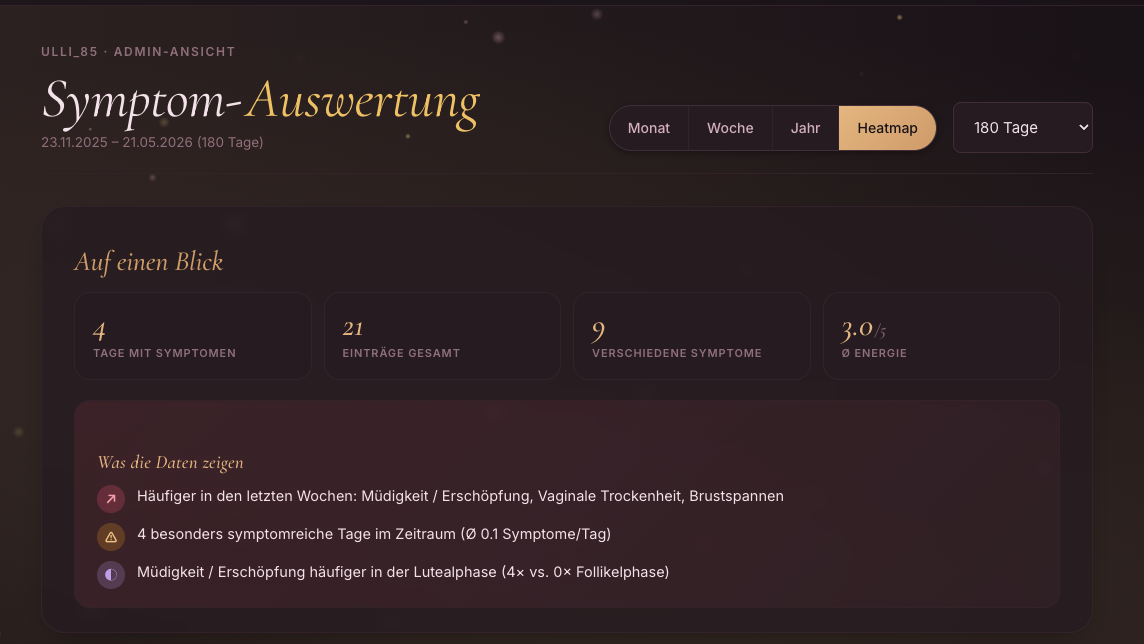
Heatmap zeigt die Top 12 Symptome an Häufigkeit. Wenn keine Symptome erfasst sind oder nur Mood/Energy: kein Inhalt. Range erweitern (90 → 365 Tage) hilft manchmal.
Aus Backup wiederherstellen:
docker compose down
mv data data-broken
tar xzf vellaphine-backup-2026-05-10.tar.gz
docker compose up -d
Browser hat prefers-reduced-motion aktiviert (Betriebssystem-Einstellung "Bewegung reduzieren"). Vellaphine respektiert das absichtlich.
---
LICENSE-Datei im ZIP (falls vorhanden)Vellaphine ist ein eigen-gehostetes Tool: keine Telemetrie, keine externen Aufrufe (außer Google Fonts beim ersten Laden und — falls aktiviert — Push-Endpoints von Mozilla/Google für Notifications), keine Tracker.
Your personal companion through every life phase.
Self-hosted journal for menopause symptoms and cycle tracking. All data remains on your own server; nobody outside your household has access.
This guide covers all common platforms — Linux, macOS, Windows, NAS devices, Raspberry Pi, and cloud servers.
---
---
| Component | Minimum | Recommended | |-----------|---------|-------------| | Docker Engine | 20.10 | 24.0+ | | Docker Compose | v2 (Plugin) | v2.20+ | | Disk Space | 250 MB | 1 GB | | RAM | 256 MB | 512 MB | | CPU | 1 core (x86_64 or ARM64) | 2 cores | | Port | 8421 (available) | freely configurable | | Network | LAN only for initial setup | Internet for updates | | HTTPS | optional | required for push notifications |
Vellaphine runs headless as a Docker container. A graphical interface is not required.
---
On any system with Docker and Docker Compose installed:
# 1. Extract ZIP
unzip vellaphine.zip -d vellaphine
cd vellaphine

# 2. Build and start container
docker compose up -d --build

# 3. Open app in browser
# http://<host>:8421
Default login:
adminadmin⚠️ Change immediately under "Account" → "Password" after first login.
On first startup, the following are automatically created:
data/vellaphine.dbdata/secret.keydata/vapid_priv.pem + data/vapid_pub.txt---
sudo apt update && sudo apt upgrade -y
sudo apt install -y ca-certificates curl gnupg

sudo install -m 0755 -d /etc/apt/keyrings
sudo curl -fsSL https://download.docker.com/linux/ubuntu/gpg -o /etc/apt/keyrings/docker.asc
sudo chmod a+r /etc/apt/keyrings/docker.asc

echo "deb [arch=$(dpkg --print-architecture) signed-by=/etc/apt/keyrings/docker.asc] \
  https://download.docker.com/linux/ubuntu $(. /etc/os-release && echo "$VERSION_CODENAME") stable" | \
  sudo tee /etc/apt/sources.list.d/docker.list > /dev/null

sudo apt update
sudo apt install -y docker-ce docker-ce-cli containerd.io docker-buildx-plugin docker-compose-plugin
sudo usermod -aG docker $USER
For Debian, replace the repository path with linux/debian.
mkdir -p ~/docker/vellaphine
cd ~/docker/vellaphine
unzip /path/to/vellaphine.zip -d .
docker compose up -d --build
On first build, bcrypt and cryptography (for push) are compiled. On x86_64 this takes about 2–3 minutes; on ARM64 (Pi) about 4–6 minutes.
Docker containers with restart: unless-stopped (already set in docker-compose.yml) start automatically after reboot.
sudo systemctl enable docker
---
sudo dnf -y install dnf-plugins-core
sudo dnf config-manager --add-repo https://download.docker.com/linux/fedora/docker-ce.repo
sudo dnf install -y docker-ce docker-ce-cli containerd.io docker-compose-plugin

sudo systemctl enable --now docker
sudo usermod -aG docker $USER

mkdir -p ~/docker/vellaphine && cd ~/docker/vellaphine
unzip /path/to/vellaphine.zip -d .
docker compose up -d --build
On RHEL/Rocky/AlmaLinux, replace the path with linux/centos.
sudo firewall-cmd --permanent --add-port=8421/tcp
sudo firewall-cmd --reload
If SELinux is active:
chcon -Rt svirt_sandbox_file_t ./data
---
sudo pacman -S docker docker-compose
sudo systemctl enable --now docker
sudo usermod -aG docker $USER

mkdir -p ~/docker/vellaphine && cd ~/docker/vellaphine
unzip /path/to/vellaphine.zip -d .
docker compose up -d --build
---
.dmg, drag app to Applications folderAlternative: OrbStack (https://orbstack.dev) — faster and more resource-efficient than Docker Desktop. Free for personal use.
mkdir -p ~/Docker/vellaphine
cd ~/Docker/vellaphine
unzip ~/Downloads/vellaphine.zip -d .
docker compose up -d --build
Open app in browser: http://localhost:8421
Docker Desktop → Preferences → "Start Docker Desktop when you log in" → enable.
---
   wsl --install
   wsl --set-default-version 2
In the WSL2 shell (Ubuntu):
mkdir -p ~/docker/vellaphine
cd ~/docker/vellaphine
cp /mnt/c/Users/<YourUser>/Downloads/vellaphine.zip .
unzip vellaphine.zip
docker compose up -d --build
Open app in browser: http://localhost:8421
---
/docker/vellaphine, extract ZIP contents there- Project name: vellaphine - Path: /docker/vellaphine - Source: "Use docker-compose.yml that exists in the folder"
ssh admin@nas
sudo -i
cd /volume1/docker
mkdir vellaphine && cd vellaphine
unzip /volume1/homes/admin/vellaphine.zip -d .
docker compose up -d --build
App: http://nas-ip:8421
DSM Control Panel → "Login Portal" → "Advanced" → "Reverse Proxy" → "Create":
vellaphine.your-domain.tld, port 443localhost, port 8421DSM handles Let's Encrypt certificate under "Security" → "Certificate".
---
UGOS is based on Debian. Vellaphine runs very well here.
ssh user@nas-ip
sudo -i
mkdir -p /volume1/docker/vellaphine
cd /volume1/docker/vellaphine

unzip /volume1/uploads/vellaphine.zip -d .
docker compose up -d --build
App: http://nas-ip:8421
Open UGREEN Container Manager → "Create Project" → path /volume1/docker/vellaphine → use Compose file.
UGOS standard: PUID=1000, PGID=10. If Vellaphine cannot write to data/ files, add to docker-compose.yml:
services:
  vellaphine:
    user: "1000:10"
---
docker-compose.yml, adjust volume path: volumes:
- /share/Container/vellaphine/data:/data
/share/Container/vellaphine/---
ssh root@truenas
cd /mnt/<pool>/docker
mkdir vellaphine && cd vellaphine
unzip /tmp/vellaphine.zip -d .
docker compose up -d --build
TrueNAS SCALE 24.10+ officially uses Docker; earlier versions use k3s. For k3s versions, use "Custom App" with container parameters from the Dockerfile.
---
curl -fsSL https://get.docker.com | sudo sh
sudo usermod -aG docker $USER
newgrp docker

mkdir -p ~/docker/vellaphine && cd ~/docker/vellaphine
unzip ~/vellaphine.zip
docker compose up -d --build
First build on a Pi 4 takes about 6–8 minutes (bcrypt + cryptography compile). Then the app runs with ~80–120 MB RAM.
64-bit OS recommended (Raspberry Pi OS 64-bit or Ubuntu Server arm64).
---
apt update && apt upgrade -y
curl -fsSL https://get.docker.com | sh
apt install -y unzip

mkdir -p /opt/vellaphine && cd /opt/vellaphine
unzip ~/vellaphine.zip
docker compose up -d --build
Access app via public IP: http://<vps-ip>:8421
⚠️ On public servers, always:
   ufw allow 22/tcp
   ufw allow 80/tcp
   ufw allow 443/tcp
   ufw deny 8421/tcp
   ufw enable
---
http://<host>:8421admin / adminDisabled by default. Enable under:
---
For HTTPS and a nice domain name, you need a reverse proxy. Web push notifications only work with HTTPS. Without TLS, browsers refuse permission.
Add to /etc/caddy/Caddyfile:
vellaphine.your-domain.tld {
    reverse_proxy localhost:8421
    encode gzip zstd
    header {
        X-Frame-Options "SAMEORIGIN"
        X-Content-Type-Options "nosniff"
        Referrer-Policy "strict-origin-when-cross-origin"
        -Server
    }
}
HTTPS with Let's Encrypt is set up automatically. Run sudo systemctl reload caddy.
vellaphine.your-domain.tld<docker-host-ip> or vellaphine8421/etc/nginx/sites-available/vellaphine.conf:
server {
    listen 443 ssl http2;
    server_name vellaphine.your-domain.tld;

    ssl_certificate /etc/letsencrypt/live/.../fullchain.pem;
    ssl_certificate_key /etc/letsencrypt/live/.../privkey.pem;

    location / {
        proxy_pass http://127.0.0.1:8421;
        proxy_set_header Host $host;
        proxy_set_header X-Real-IP $remote_addr;
        proxy_set_header X-Forwarded-For $proxy_add_x_forwarded_for;
        proxy_set_header X-Forwarded-Proto $scheme;
    }
}
server {
    listen 80;
    server_name vellaphine.your-domain.tld;
    return 301 https://$server_name$request_uri;
}
sudo ln -s /etc/nginx/sites-available/vellaphine.conf /etc/nginx/sites-enabled/
sudo certbot --nginx -d vellaphine.your-domain.tld
sudo nginx -t && sudo systemctl reload nginx
Extend docker-compose.yml:
services:
  vellaphine:
    labels:
      - traefik.enable=true
      - traefik.http.routers.vellaphine.rule=Host(`vellaphine.your-domain.tld`)
      - traefik.http.routers.vellaphine.tls.certresolver=letsencrypt
      - traefik.http.services.vellaphine.loadbalancer.server.port=8421
    networks:
      - traefik
networks:
  traefik:
    external: true
Once Vellaphine is reachable exclusively via HTTPS:
services:
  vellaphine:
    environment:
      - SECURE_COOKIES=1
⚠️ Only enable once HTTPS is running.
---
Vellaphine can remind you of expected period, ovulation day, and daily journal entries.
pywebpush (already in Dockerfile)Generated automatically on first container start in:
data/vapid_priv.pem (private, never share)data/vapid_pub.txt (public key, requested by frontend)Never delete — if lost, all subscriptions must be recreated.
In docker-compose.yml:
environment:
  - VAPID_SUBJECT=mailto:your-name@your-domain.tld
Defaults to mailto:admin@example.com. Some push services (especially Mozilla Autopush) require a real email address — otherwise pushes don't arrive.
- Period reminder — when period is expected today - Ovulation hint — on estimated ovulation day - Daily journal reminder — custom time (default 20:00)
A background thread in the container checks every 5 minutes if push notifications are due. In multi-worker setups (e.g. gunicorn with 2 workers), a file lock (data/notify.lock) ensures only one worker actually sends.
Each device and browser must be enabled separately — this is browser-dependent, not Vellaphine. A subscription belongs to exactly one browser profile. Clearing cookies requires re-enabling.
# Check if pywebpush works in container
docker compose exec vellaphine python -c \
  "from pywebpush import webpush; print('OK')"

# VAPID keys present?
docker compose exec vellaphine ls -la /data/vapid_*

# Does /api/push/key return the public key?
curl -s http://localhost:8421/api/push/key
# expected response: {"public_key":"BG...","enabled":true}

# Health endpoint shows has_webpush
curl -s http://localhost:8421/healthz
# expected response: {"app":"Vellaphine","has_webpush":true,"status":"ok",...}
If enabled: false or has_webpush: false: pywebpush module not installed (build issue). Check logs:
docker compose logs vellaphine | grep -i pywebpush
Solution usually: rebuild container with --no-cache:
docker compose build --no-cache && docker compose up -d
---
All data lives exclusively in ./data/ next to docker-compose.yml:
vellaphine.db — SQLite database (users, entries, symptoms, custom symptoms, push subscriptions, mood/energy)secret.key — session keyvapid_priv.pem + vapid_pub.txt — push keysnotify.lock — background worker lock (can be ignored)cd /path/to/vellaphine
tar czf vellaphine-backup-$(date +%F).tar.gz data/
/etc/cron.daily/vellaphine-backup:
#!/bin/bash
cd /opt/vellaphine
tar czf "/mnt/backup/vellaphine-$(date +\%F).tar.gz" data/
find /mnt/backup/ -name "vellaphine-*.tar.gz" -mtime +30 -delete
chmod +x /etc/cron.daily/vellaphine-backup
In addition to server backups, each user can export their own data:
cd /path/to/vellaphine
docker compose down
rm -rf data
tar xzf vellaphine-backup-2026-05-10.tar.gz
docker compose up -d
---
The data/ volume always remains untouched — schema changes are automatically applied via ALTER TABLE migrations (e.g. new columns for mood, energy, custom symptoms, notifications).
cd /path/to/vellaphine
docker compose down
unzip -o vellaphine-new.zip -d .
docker compose up -d --build
Check after update:
docker compose logs vellaphine | tail -30
---
docker compose logs -f vellaphine                  # Live
docker compose logs --tail=100 vellaphine          # Last 100 lines
docker compose logs --since=$(date -I) vellaphine  # Since today
docker compose ps                                  # Container status
docker compose exec vellaphine bash                # Shell in container
curl http://localhost:8421/healthz
# {"app":"Vellaphine","status":"ok","time":"...","has_webpush":true}
docker compose exec vellaphine python -c \
  "import sqlite3; c=sqlite3.connect('/data/vellaphine.db'); \
   print(c.execute('SELECT username, is_admin, color_mode, accent_palette, notify_period_expected FROM users').fetchall())"
docker compose exec vellaphine python -c \
  "import sqlite3; c=sqlite3.connect('/data/vellaphine.db'); \
   print(c.execute('SELECT user_id, COUNT(*) FROM push_subscriptions GROUP BY user_id').fetchall())"
docker compose exec vellaphine python -c \
  "import sqlite3; c=sqlite3.connect('/data/vellaphine.db'); \
   print(c.execute('SELECT label, sym_group FROM custom_symptoms WHERE user_id=1').fetchall())"
---
Another service is using the port. In docker-compose.yml:
ports:
  - "8488:8421"
/datasudo chown -R 1000:1000 ./data
Admin reset:
docker compose exec vellaphine python -c \
  "import bcrypt, sqlite3; \
   h = bcrypt.hashpw(b'NewPassword', bcrypt.gensalt()).decode(); \
   c = sqlite3.connect('/data/vellaphine.db'); \
   c.execute('UPDATE users SET password_hash=? WHERE username=?', (h, 'admin')); \
   c.commit()"
Check in order:
https://? Without TLS, browsers refuse permission./api/push/key return a valid key? (see above)On iOS Safari: push only works from iOS 16.4+ and only if the app was previously "Add to Home Screen".
Account → Background → "None". Saves CPU entirely.
sudo systemctl start docker
sudo usermod -aG docker $USER
newgrp docker
On ARM devices (Pi, Apple Silicon), cryptography (push dependency) takes 3–6 minutes. Be patient — subsequent builds are cached and fast.
If build still fails: verify gcc, libffi-dev, libssl-dev are in Dockerfile (they are in standard Dockerfile). On very old ARM systems, possibly add pip install --upgrade pip in build step.
docker compose ps
docker compose exec vellaphine curl -s http://localhost:8421/healthz
sudo ufw status
sudo iptables -L
This is browser print behavior. In print dialog, click "More settings" → disable "Background graphics" for pure black/white. Or try Firefox instead of Chrome — often renders PDF print with better contrast.
Heatmap shows top 12 symptoms by frequency. If no symptoms logged or only mood/energy: no content. Expanding range (90 → 365 days) sometimes helps.
Restore from backup:
docker compose down
mv data data-broken
tar xzf vellaphine-backup-2026-05-10.tar.gz
docker compose up -d
Browser has prefers-reduced-motion enabled (OS "reduce motion" setting). Vellaphine respects this intentionally.
---
LICENSE file in ZIP (if present)Vellaphine is a self-hosted tool: no telemetry, no external calls (except Google Fonts on first load and — if enabled — push endpoints from Mozilla/Google for notifications), no trackers.
Preise